
DIY Vinyl Siding Replacement: Fix a Damaged Panel
When you see damaged siding, the big question is often: repair or replace? A single cracked panel might seem like a quick fix, but sometimes it’s a symptom of a larger problem, like improper installation or age-related failure. Making the right call can save you time and money in the long run. This guide will help you assess the situation like a pro. We’ll explore the signs of widespread issues, the costs involved, and the critical difference between a temporary patch and a lasting solution, so you can confidently decide if it’s time for a full vinyl siding replacement.
Key Takeaways
- Give your siding room to breathe
: Vinyl siding expands and contracts, so never nail it down tightly. Leave a small gap (about a dime's thickness) between the nail head and the panel, and center your nails in the slots to prevent buckling and cracking.
- Don't just cover up problems
: Before installing a new panel, always inspect the wall underneath for soft spots, water stains, or rot. Covering up hidden damage will only lead to more serious structural issues and mold growth later on.
- Some jobs are best left to the pros
: While fixing one panel is a great DIY win, widespread damage or signs of rot are red flags. Call a professional to handle extensive issues or complex storm damage claims to protect your home's integrity.
Signs It's Time to Replace Your Vinyl Siding
Vinyl siding is a tough, low-maintenance choice for protecting your home, but it won’t last forever. Here in Minnesota, our homes endure everything from blistering summer sun to heavy snow and ice, which can take a toll on any exterior. Taking a few minutes to walk around your house and inspect your siding can help you catch problems early, before they turn into costly structural issues.
While a single damaged panel might be a straightforward DIY fix, widespread issues often signal that it’s time for a full replacement. Knowing what to look for helps you understand whether you're facing a small repair or a larger project. If you spot several of these signs, it might be time to consider new siding services to keep your home protected and looking its best. Your siding is your home's first line of defense against the elements, so keeping it in good shape is crucial for protecting your investment and maintaining your home's value. Think of it like a regular check-up; a quick inspection each spring and fall can save you a lot of headaches down the road. This guide will walk you through the key warning signs that your siding is failing, helping you make an informed decision about your next steps.
Spotting cracks, holes, and warping
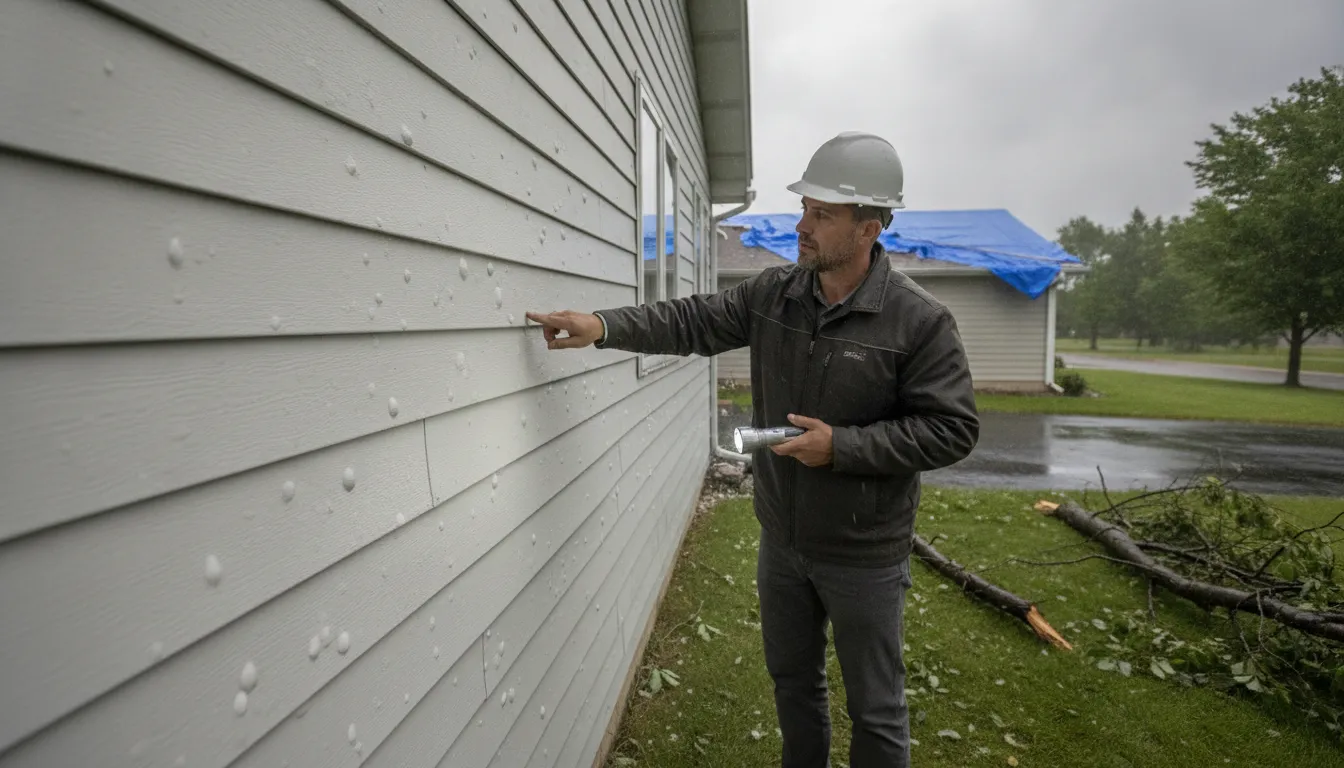
One of the most obvious signs of failing siding is visible damage. Take a close look at your home’s exterior for long cracks, small holes, or panels that are bent and warped. This kind of damage often results from impacts, like a stray baseball or hail from a recent storm. It can also happen over time as the vinyl becomes brittle from sun exposure and temperature changes. While a single crack isn't a catastrophe, it does break the protective seal of your siding. Multiple cracked or warped panels are a clear sign that the material is nearing the end of its life and can no longer effectively shield your home from the elements. This is especially true after severe weather, which may require professional storm damage repair.
Finding soft spots or moisture damage
Your siding’s most important job is to keep water out. If moisture gets trapped behind it, you could be facing serious problems. As you inspect your siding, gently press on a few panels. If they feel soft, spongy, or bouncy, it’s a major red flag. This usually means water has penetrated the siding and is damaging the wooden sheathing underneath. You might also notice bubbling or peeling paint near these areas. Don't ignore this sign. Water damage can lead to wood rot, mold growth, and even compromise your home's structural integrity. Any rotted material must be repaired before new siding can be installed, making it a job best left to professionals who know how to handle underlying issues.
Noticing faded or deteriorating color
Has your home’s vibrant color started to look dull and washed out? Significant fading is more than just a cosmetic issue; it’s a sign of age. The color on vinyl siding is designed to last for about 10 to 15 years. Once it starts to fade, it means the siding’s protective top layer is breaking down from years of UV exposure. While faded siding doesn't create an immediate emergency, it indicates that the vinyl is becoming more brittle and less resilient. If you're planning to sell your home soon or simply want to restore its curb appeal, replacing faded siding can make a huge difference. It’s an opportunity to update your home’s look while renewing its first line of defense.
Seeing loose or misaligned panels
Walk around your home and pay attention to how the siding panels line up. Do you see any that are sagging, pulling away from the wall, or have gaps between them? Loose or misaligned panels are a serious concern because they create a direct path for wind and rain to get behind your siding. This can happen if the siding was nailed too tightly during installation, preventing it from expanding and contracting naturally with temperature changes. Over time, this stress can cause panels to warp or pop loose. If you notice several panels are out of place, your home is vulnerable to moisture intrusion and pests, signaling that a replacement is needed to secure your home’s exterior.
Gather Your Tools and Materials
Before you can jump into replacing that damaged siding panel, you need to get your workspace in order. A little prep work goes a long way, and having the right tools and materials on hand will make this project much smoother and less frustrating. Think of it like following a recipe; you wouldn't start baking without getting your flour and eggs out first. Taking a few minutes to gather everything you need ensures you can work efficiently and get a professional-looking result. Most of what you’ll need is pretty standard, but there are a couple of specialty items that are total game-changers for this specific task. Let’s walk through exactly what you should have ready before you begin.
Essential tools for the job
You’ll be happy to know you probably have most of the tools for this job in your garage or workshop already. The basics include a reliable hammer, a pry bar, and something to cut the vinyl, like tin snips or a sharp utility knife. You will also need a tape measure for getting your replacement panel just right. The one specialty item you absolutely need is a siding removal tool, which is often called a zip tool. It’s specifically designed to unlock vinyl panels without causing any damage, making it a must-have for this repair.
Vinyl siding removal (zip) tool
This little gadget is your best friend for this project. A vinyl siding removal tool, or zip tool, has a unique hook on the end that’s designed to slide under the edge of a siding panel and pop open the interlocking seam. Trying to do this with a screwdriver or another makeshift tool will almost certainly crack or damage the surrounding panels, turning a small repair into a much bigger headache. A zip tool is inexpensive and makes it easy to safely unhook the panel above the one you’re replacing, giving you the access you need.
Tin snips or a utility knife
You’ll need to cut your new vinyl panel to the exact length of the one you’re removing. For this, a good pair of tin snips or a sharp utility knife will work perfectly. If you’re using a utility knife, it’s a good idea to use a straight edge, like a framing square, to guide your cut and keep the line perfectly clean. Vinyl can be tough, so a fresh blade will make the job much easier and safer. Always be careful when cutting, and make sure you’re working on a stable surface.
Hammer and a pry bar
These two classic tools are essential for the demolition phase of the project. Once you’ve unhooked the panel above the damaged one, you’ll need to remove the nails holding the old piece in place. A pry bar or the claw end of your hammer will help you pull those nails out without much trouble. You’ll then use the hammer again to secure the new panel. It’s a simple but crucial part of the process, so make sure you have a comfortable hammer and a sturdy pry bar ready to go.
Necessary materials
With your tools lined up, it’s time to focus on the materials. This is where attention to detail really counts. You’ll obviously need a replacement siding panel, but you also need the right fasteners and a weather barrier to ensure your repair is durable and watertight. Getting these materials right is just as important as the installation itself. A poorly matched panel or the wrong type of nails can compromise the look and function of your home’s exterior, so let’s make sure you have exactly what you need.
Matching replacement vinyl panels
Finding a replacement panel that matches your existing siding is key to a seamless repair. You’ll want to match the color, texture, and profile as closely as possible. It’s a good idea to take a small piece of the damaged siding with you to the store. When you cut your new panel, make it about an inch longer than the gap so it can overlap the adjacent panels properly. If your siding has factory-molded overlapping tabs, you’ll need to replicate those on your cut piece so everything lays flat. If you’re struggling to find a match for older siding, our team has experience sourcing materials for all types of homes and can help with your siding services.
1.5-inch aluminum roofing nails
The type of nails you use matters. For vinyl siding, 1.5-inch aluminum or galvanized steel roofing nails are the standard. These are corrosion-resistant and have a wide head that holds the siding securely without pulling through the nailing flange. When you install the new panel, you’ll place a nail every 12 to 16 inches. It’s very important to center the nail in the middle of the nailing slot and not drive it in all the way, but we’ll cover that specific technique a little later.
Weather barrier or house wrap
Don’t forget what’s behind the siding. The weather-resistant barrier, or house wrap, is your home’s primary defense against moisture. When you remove the damaged panel, inspect this barrier for any rips or holes. If you find any damage, you must repair it before installing the new siding. You can patch small tears with house wrap tape. A compromised weather barrier can lead to serious water damage and rot, so this is a step you can’t afford to skip. If you suspect more widespread issues from a recent storm, it might be time for a professional storm damage repair inspection.
Work Safely: Key Precautions for Siding Repair
Before we get into the nuts and bolts of the repair, let's talk about the most important step: working safely. A successful DIY project is one you walk away from with all your fingers and toes intact, and a little planning goes a long way. Tackling a siding repair means you'll likely be working with sharp tools and at a bit of a height. Paying attention to your gear, your footing, and even the weather will make the entire process smoother and safer for everyone. When in doubt, remember that professional siding services are always an option if a project feels too big or unsafe to handle on your own.
Wear the right protective gear
First things first, let's get you geared up. You'll be cutting vinyl and pulling nails, which can send small, sharp pieces flying. A good pair of safety glasses is non-negotiable to protect your eyes. Next, grab a pair of sturdy work gloves. Vinyl edges can be surprisingly sharp, and gloves will save your hands from cuts and scrapes. Finally, wear some solid, closed-toe shoes, preferably boots with good grip. You need stable footing, especially if you'll be on a ladder. This isn't the time for flip-flops or old sneakers. Taking a few minutes to put on the right personal protective equipment makes a world of difference and sets you up for a successful repair.
Stay safe when working at heights
Most siding repairs will require you to work off the ground, so let's talk about ladder safety. Make sure your ladder is in good condition and placed on a firm, level surface. Never set it up on soft or uneven ground. When you lean it against the house, ensure it's at a safe angle and won't slip. A good rule of thumb is the 4-to-1 rule: for every four feet of height, the base should be one foot away from the wall. It’s tempting to stretch to reach that last spot, but always move the ladder instead. Overreaching is a common cause of falls, and we want to avoid that. Your safety is worth the extra minute it takes to reposition.
Choose the right day for the job
Believe it or not, the weather plays a big role in how your siding repair turns out. Vinyl siding expands and contracts with temperature changes, so it's best to work on a mild, overcast day. Extreme cold can make the vinyl brittle and more likely to crack when you're cutting or handling it. On the other hand, intense heat and direct sun can make it too soft and flexible, which can lead to an improper fit. You'll also want to avoid windy or rainy days for obvious reasons. A calm, temperate day not only makes the work more pleasant for you, but it also helps ensure the repair is done correctly for a long-lasting fix.
How to Replace a Damaged Siding Panel: A Step-by-Step Guide
Ready to tackle that damaged siding? It might look intimidating, but with the right tools and a little patience, you can replace a single panel yourself. This fix can keep your home's exterior looking great and prevent small issues from turning into bigger problems. While we're always here to help with professional siding services, this step-by-step breakdown will guide you through the process if you want to give it a try, ensuring you get a clean, professional-looking result.
Step 1: Unhook the panel above the damaged one
First things first, you need to get access to the damaged panel. To do this, you'll unhook the panel directly above it. Grab your vinyl siding removal tool, also known as a zip tool. Slide the curved tip of the tool under the bottom edge of the upper panel and hook it onto the lip. Gently pull down and slide the tool horizontally along the seam. You'll feel the panel "unzip" or unlock from the one below it. Work your way along the length of the panel until you have enough room to comfortably access the damaged section.
Step 2: Remove the damaged panel and its nails
With the upper panel out of the way, you can now focus on removing the damaged piece. You'll see the nailing strip at the top of the panel where it's fastened to the wall. Use a pry bar or the claw of a hammer to carefully pull out each nail. Be gentle to avoid damaging the sheathing underneath. Once all the nails are removed, the panel should be loose. You may need to gently flex it to slide it out from behind the overlapping adjacent panels on either side.
Step 3: Inspect the sheathing for hidden damage
This step is one you absolutely shouldn't skip. Before you rush to install the new panel, take a close look at the wall sheathing you've just exposed. You're looking for any signs of trouble, like water stains, soft spots, mold, or rot. If the siding was damaged by a hailstorm or flying debris, there could be underlying issues. Catching these problems early is key. If you find anything that looks like significant water or storm damage, it's best to address that before putting on new siding.
Step 4: Measure and cut your new panel to size
Now it's time to prep your replacement panel. Measure the length of the panel you just removed. You'll want to cut your new piece to the same size. For a precise cut, use a pair of tin snips or a utility knife with a fresh blade. If you're using a utility knife, score the panel first and then snap it along the line for a clean break. Double-check your measurements before you make the cut. It's always better to measure twice and cut once.
Step 5: Slide the new panel into position
With your new panel cut and ready, it's time to fit it into place. Start by sliding the bottom edge of the new panel into the locking channel of the panel below it. You should feel it snap securely into place. Next, gently flex the panel to slide the ends into the J-channels or behind the overlapping adjacent panels. Once the bottom is locked and the sides are in position, the top of the panel should be sitting flat against the wall, with the nailing strip exposed and ready for fasteners.
Step 6: Nail the new panel correctly (leave it loose)
Here's where technique really matters. When you nail the new panel, you must leave it slightly loose to allow for expansion and contraction with temperature changes. Place a nail in the center of each nailing slot, about every 12 to 16 inches. Do not drive the nail all the way in. Leave about a 1/32-inch gap (roughly the thickness of a dime) between the nail head and the vinyl. This small gap is crucial for preventing the siding from buckling or cracking over time.
Step 7: Lock the panels together and check your work
You're on the home stretch! With the new panel nailed in place, it's time to lock the upper panel back down. Use your zip tool again for this. Hook the tool onto the bottom lip of the upper panel and gently pull it down while pushing it inward. You'll hear and feel it snap back into the locking channel of your new panel. Slide the tool along the seam to secure the entire length. Finally, step back and admire your work. Check that all the seams are tight and the panels are straight.
How to Make Your New Siding Last
Replacing a damaged siding panel is a great start, but making sure that repair lasts involves the same techniques that go into a professional installation. The key to long-lasting vinyl siding isn't just the quality of the material; it's how it's installed. When siding is put on correctly, it can withstand Minnesota’s wild temperature swings, heavy rain, and snow for decades. When it’s done wrong, you’ll see problems like warping, cracking, and buckling in just a few seasons.
Whether you’re replacing a single panel or considering a full exterior update, a few core principles make all the difference. It’s all about giving the siding room to move, using the right fastening techniques, and ensuring the wall underneath is protected. Getting these details right is what separates a temporary fix from a lasting solution. If you’re ever unsure, our team is always ready to help with professional siding services that guarantee a flawless finish.
Allow room for expansion and contraction
Vinyl siding expands in the summer heat and shrinks in the winter cold. To prevent it from buckling or cracking, you have to give it space to move. This means you should never nail the panels down tightly. Instead, drive the nail until its head is about 1/32 of an inch away from the siding. An easy way to visualize this is to leave a gap the thickness of a dime between the nail head and the vinyl. This small space allows the panel to hang freely and adjust to temperature changes without stress.
Use the right nailing technique
Where you place your nails is just as important as how deep you drive them. Always center your nails in the middle of the panel’s nailing slots, and place them every 12 to 16 inches. Nailing in the center gives the panel room to slide back and forth as it expands and contracts. If you drive a nail into the very end of a slot, you pin the panel in place. When the temperature changes, the vinyl will pull against the nail, which can cause the panel to warp or even crack over time.
Check and repair the moisture barrier
Your siding is your home’s first line of defense against the elements, but the weather-resistant barrier (or house wrap) underneath is the critical backup. Before you install a new panel, always inspect the sheathing and house wrap for damage. If you see any tears, holes, or signs of rot on the wood beneath, you must fix it first. Simply covering up moisture damage is a recipe for disaster, as it can lead to mold and structural issues down the road. Hidden water intrusion is often a sign of bigger problems, sometimes related to storm damage.
Follow the manufacturer's instructions
While most vinyl siding products are similar, each manufacturer has specific guidelines for a reason. Always read the installation manual that comes with your new siding panels. It will provide the most accurate information on everything from how much panels should overlap to the specific type of nails you should use. The manufacturer’s guide is your best resource for getting the job done right. It’s also smart to check local building codes, as your city may have its own requirements for exterior projects.
Avoid These Common Siding Replacement Mistakes
Replacing a damaged siding panel can feel like a straightforward weekend project. While it's definitely a manageable DIY task for many homeowners, a few common missteps can lead to bigger problems down the road. Making a small mistake during installation can cause your new siding to warp, buckle, or fail to protect your home from moisture, turning a simple fix into a costly headache.
Knowing what to watch out for is half the battle. By avoiding these frequent errors, you can make sure your repair not only looks seamless but also stands up to Minnesota's weather for years to come. A successful siding replacement protects your home's value and gives you peace of mind. Let’s walk through the mistakes you’ll want to steer clear of.
Nailing the panels on too tightly
This is one of the most frequent mistakes we see. Vinyl siding is designed to expand and contract with temperature changes. If you drive the nails in too tightly against the panel, you restrict this natural movement. When the siding expands in the summer heat, it will have nowhere to go and will start to buckle, warp, or ripple. To prevent this, make sure to leave a small gap, about the thickness of a dime, between the nail head and the vinyl. You should also center the nail in the middle of the nailing slot, which allows the panel to shift from side to side as needed. Proper installation is key to the longevity of your home's exterior, which is why professional siding services focus so heavily on these details.
Forgetting to inspect the underlayment
What’s behind your siding is just as important as the siding itself. Before you install a new panel, it's absolutely essential to inspect the wall sheathing and weather barrier underneath. Failing to check for underlying damage is a critical oversight. Your siding is your home's first line of defense, but if moisture has already gotten through, you might find soft spots, rot, or mold on the wall. Simply covering up these issues will only allow them to worsen, potentially leading to serious structural problems. If you find any damage, you must address it before putting on the new panel. Sometimes, these issues can stem from other areas, so a thorough inspection is always a good idea.
Using mismatched colors or panels
Nothing screams "patch job" like a siding panel that doesn't quite match the rest of the house. Finding an exact color match can be surprisingly difficult, especially if your siding has been exposed to the sun for years and has faded over time. Even if you know the original color name, a new panel can look noticeably different from the weathered ones around it. To get the best match, take a piece of the damaged siding with you to the supplier. If you can't find a perfect match, here’s a pro tip: carefully remove a panel from a less visible part of your house, like behind a large shrub or your AC unit, and use it for the repair. Then, you can install the new, slightly different panel in that hidden spot.
Overlooking local building codes
Before you even pick up a hammer, take a moment to check the local building codes in your area. This is a step many DIYers forget, but it’s crucial for ensuring your work is compliant and safe. Building codes can have specific requirements for siding installation, the types of materials you can use, and the weather-resistant barriers needed underneath. Ignoring these regulations could lead to fines or force you to redo the entire project. A quick visit to your city or county’s website or a call to the planning department can save you a lot of trouble. As a company with deep roots in the community, we know how important it is to follow local standards, which is a core part of our commitment to quality craftsmanship. You can learn more about our dedication on our About Us page.
What Does Vinyl Siding Replacement Cost?
Figuring out the budget is often the first step in any home improvement project. While replacing a single damaged panel yourself is a fairly low-cost fix, it’s helpful to understand the full picture of siding replacement costs. Whether you’re tackling a small repair or considering a complete exterior refresh, the price can vary quite a bit. The total cost depends on the materials you choose, the size of your home, and whether you hire a professional or do the work yourself. Let’s break down what you can expect.
A look at cost per square foot
When you get a quote for professional installation, the price is typically broken down by the square foot. On average, you can expect vinyl siding to cost between $4.50 and $8.20 per square foot installed. This price includes both the siding material and the labor to put it up. Of course, there’s a range. More basic, builder-grade vinyl might start as low as $3 per square foot, while high-end, insulated, or specialty vinyl can cost $12 or more. For most homeowners, falling somewhere in that average range gives you a quality product that looks great and is installed correctly by a team of siding professionals.
What influences the total price?
Several factors can affect your final quote. The most obvious one is the size of your home; more square footage means more material and labor. The quality of the vinyl siding you select also plays a big role. Beyond that, the complexity of the job matters. A simple, one-story rectangular house is more straightforward to side than a multi-story home with lots of gables, corners, and windows. Removing and disposing of old siding will also add to the cost. All these details are why a custom quote is so important for getting an accurate price for your specific home and project needs.
Comparing DIY vs. professional costs
Doing it yourself is always tempting, and for a single cracked panel, you can definitely save money on labor. A replacement panel and a few tools might be all you need. However, proper installation is key to making sure your siding protects your home. It requires specific skills to ensure panels can expand and contract with temperature changes and are sealed against moisture. An improper installation can lead to buckling, warping, and water damage, which are much more expensive to fix down the road. For larger projects or storm damage repairs, hiring a professional ensures the job is done right, protecting your investment for years to come.
Know When to Call a Professional
Taking on a DIY project can be incredibly rewarding, and replacing a single panel of vinyl siding is a manageable task for many homeowners. But it's just as important to know your limits. Some situations require more than a zip tool and a bit of grit; they need the experience, tools, and diagnostic skills of a professional. Pushing forward with a DIY repair when the problem is bigger than you thought can lead to more extensive damage and higher costs down the road. If you encounter widespread issues, signs of rot, or find yourself dealing with a complex insurance claim, stepping back and calling for help is the smartest move you can make. It protects your home, your time, and your investment.
Dealing with widespread damage
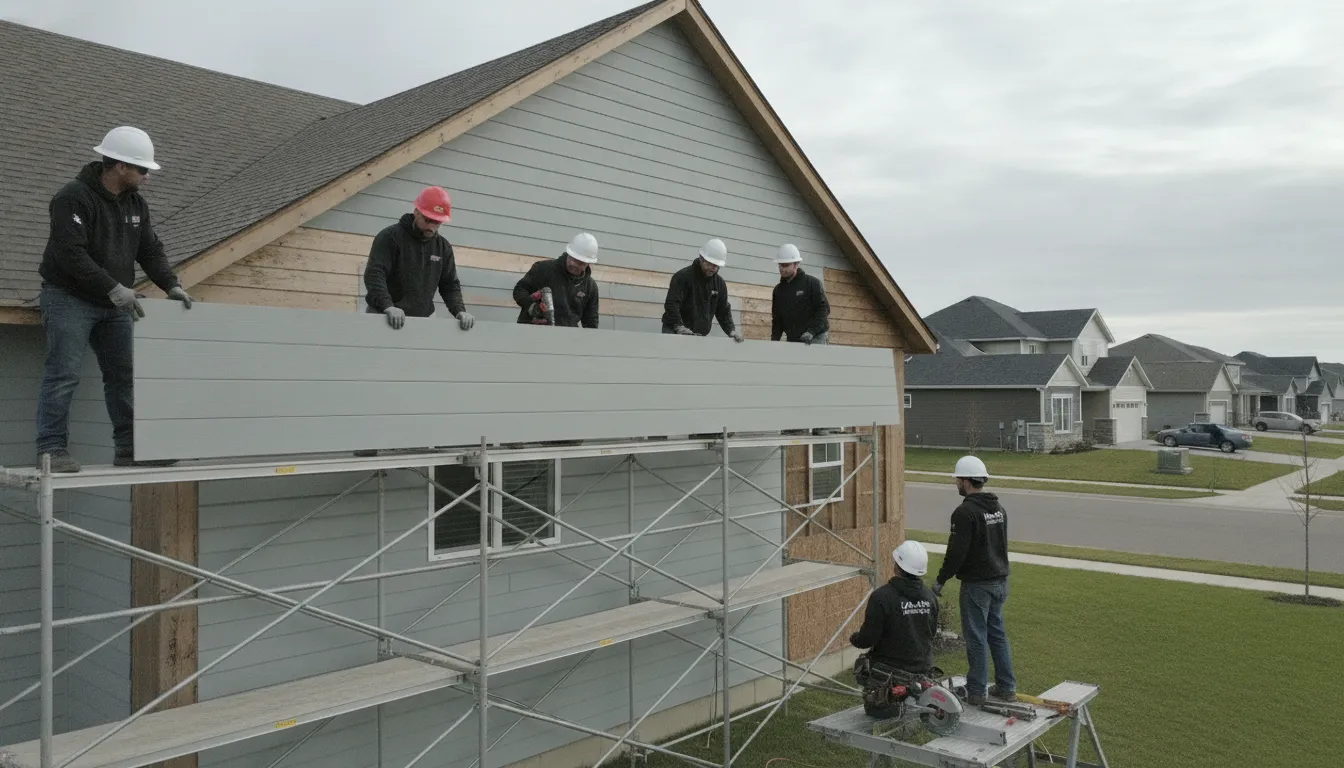
If you notice cracks, warping, or loose panels across a large section of your home, the problem likely goes beyond simple wear and tear. This kind of widespread issue often points to an aging system or, more concerningly, a faulty installation from years ago. While you can replace one or two panels, trying to patch up an entire wall can turn into a frustrating game of whack-a-mole. A professional can perform a full inspection to identify the root cause. Our team provides comprehensive siding services and can determine if a full replacement is more cost-effective than a series of small, recurring repairs, ensuring your home is properly protected for years to come.
Discovering rot or structural issues
This is the number one sign to put down your tools and pick up the phone. If you remove a damaged panel and find soft, damp, or rotted wood sheathing underneath, you’ve uncovered a much more serious problem. Siding is your home’s first line of defense, but the weather barrier and wall structure behind it are the true protectors. Any moisture that gets past the siding can lead to mold, decay, and even structural instability. Simply covering up the rot with a new panel is a recipe for disaster. A professional contractor needs to address the water intrusion and repair any underlying damage before new siding can be safely installed.
Struggling to find a color match
Vinyl siding fades over time due to sun and weather exposure. This can make finding a perfect match for a single replacement panel surprisingly difficult, especially if your siding is more than a few years old. A mismatched panel can stick out like a sore thumb and detract from your home’s curb appeal. While you might get lucky at the hardware store, professionals have access to a wider network of suppliers and can often find exact or very close matches. If a perfect match isn't available, they can offer alternative solutions, like replacing a small, contained section to ensure the repair blends in seamlessly with the rest of your home.
Minnesota weather can be tough on siding. After a major hailstorm or high winds, it’s wise to have an expert assess the situation. The damage might be more extensive than what’s visible from the ground, and a professional knows exactly what to look for. Furthermore, dealing with insurance companies can be a confusing and time-consuming process. An experienced contractor can document the damage properly and communicate directly with your adjuster to make sure your claim is handled fairly. If your home has been hit by a storm, our storm damage repair specialists can manage the entire restoration process, from inspection to final installation.
Related Articles
Frequently Asked Questions
How can I tell if I just need a simple repair or a full siding replacement? A good rule of thumb is to look at the scale of the problem. If you have one or two panels that are cracked from an impact or have come loose, a targeted repair is usually a great solution. However, if you're seeing the same issues across multiple areas of your home, like widespread cracking, warping, or panels that feel soft and spongy when you press on them, it’s a sign your entire siding system is failing. In that case, a full replacement is the smarter long-term investment.
What's the biggest mistake people make when replacing siding themselves? The most common error is nailing the panels on too tightly. It feels counterintuitive, but vinyl siding needs to hang loosely on the wall so it can expand and contract with temperature changes. When you drive a nail flush against the panel, you pin it in place. This causes the siding to buckle, ripple, and warp when the weather gets hot. Always leave a small gap, about the thickness of a dime, between the nail head and the vinyl.
What should I do if I find mold or soft wood behind the damaged panel? If you pull off a piece of siding and discover soft, rotted wood or signs of mold, you should stop the project and call a professional. This is a clear indicator that water has been getting behind your siding for some time, and the problem is more than just cosmetic. Simply covering it with a new panel will trap the moisture and allow the decay to worsen, potentially leading to serious structural issues.
My siding is just faded. Is replacing it really necessary? While faded siding might seem like a purely cosmetic issue, it’s also a sign of aging. The color and protective UV coating on vinyl are designed to last for a certain period. Once that color starts to fade significantly, it means the vinyl is becoming more brittle and less resilient to impact and weather. So, while it isn't an emergency, it does mean your siding is nearing the end of its effective lifespan and has lost a key layer of its defense.
Why is it so hard to find a siding panel that matches my house perfectly? Finding a perfect match can be tricky because your existing siding has been exposed to years of sun and weather. UV rays cause the color to fade over time, so even if you find a new panel in the exact original color, it will likely look brighter and newer than the surrounding weathered panels. Professionals often have access to a wider range of suppliers or can suggest solutions, like using a panel from a hidden spot on your house for the repair, to create a more seamless look.

Comments