
Vinyl Siding Replacement: Costs, DIY & Pro Tips
Your home’s exterior is the first thing you see when you pull into the driveway. Does it still make you feel proud? Over time, faded, cracked, or outdated siding can detract from your home’s character. A vinyl siding replacement is one of the most impactful ways to completely transform your home’s appearance and boost its curb appeal. With today’s huge variety of colors, textures, and styles, you can redefine your home’s aesthetic, whether you want a classic, modern, or rustic look. This guide will cover everything from choosing the perfect panels to understanding the installation process for a flawless finish.
Key Takeaways
- Inspect your siding for key warning signs
: Regularly check for visible damage like cracks, warping, or widespread fading. Also, be aware of less obvious signals, such as higher energy bills or moisture inside your home, which can point to siding failure.
- Plan your project by understanding the costs and steps
: Replacing your siding is a valuable home improvement. The total price is influenced by your home's size and material choice, but a successful outcome always involves crucial steps like inspecting the underlying wall and ensuring a proper moisture barrier is in place.
- Recognize when to hire a professional
: While a small repair might be a DIY job, a full siding replacement is best left to experts. A professional contractor has the right tools for complex homes, can identify and fix hidden storm damage, and ensures the installation is done correctly to protect your investment.
What Is Vinyl Siding?
If you take a drive through any neighborhood, you’ll see that vinyl siding is everywhere, and for good reason. Made from a type of plastic called polyvinyl chloride (PVC), it’s one of the most popular siding materials in the country. It’s known for being durable, versatile, and low-maintenance, making it a go-to choice for homeowners who want a fresh look without a ton of upkeep. When you’re thinking about a home exterior project, understanding what vinyl brings to the table is a great first step.
The benefits of choosing vinyl
One of the biggest draws of vinyl siding is its affordability. It’s typically the most budget-friendly option on the market, with installed costs often ranging from about $4.50 to $8.20 per square foot. This makes a full home makeover much more accessible. Beyond the initial savings, vinyl is incredibly low-maintenance. It never needs to be painted, scraped, or stained. A simple cleaning with soap and water once a year is usually all it takes to keep it looking fresh. This combination of a low upfront cost and minimal long-term effort makes it a practical and attractive choice for many homeowners.
Exploring siding styles and colors
Gone are the days of limited, basic vinyl options. Today’s vinyl siding comes in a huge variety of styles, textures, and colors to match any home’s aesthetic. Whether you love the classic look of horizontal lap siding, the rustic charm of cedar shakes, or the modern appeal of vertical panels, there’s a vinyl product for you. The color palettes are also expansive, ranging from soft neutrals to bold, rich hues. Choosing new siding is a fantastic opportunity to redefine your home's character and improve curb appeal, and our team can help you explore all the beautiful and durable siding services we offer.
How siding can improve energy efficiency
New siding does more than just make your house look great; it can also help make it more energy-efficient. This is especially true if you opt for insulated vinyl siding, which has a layer of rigid foam insulation fused to the back of each panel. This insulation wraps your home in a protective blanket, reducing heat loss in the winter and heat gain in the summer. This can lead to a more comfortable home and lower energy bills year-round. For Minnesota homeowners, that extra layer of protection against our harsh weather is a significant advantage, adding long-term value to your investment.
Is It Time to Replace Your Siding? Key Signs to Look For
Your home’s siding is its first line of defense against the elements. It’s more than just a pretty face; it’s a critical barrier that protects your home’s structure from wind, rain, snow, and sun. But just like any other part of your home, it doesn’t last forever. Over time, wear and tear can compromise its integrity, leading to bigger, more expensive problems down the road. The good news is that your siding will usually give you some clear warning signs when it’s nearing the end of its life.
Catching these issues early can save you a lot of headaches. A small crack might not seem like a big deal, but it can be an open invitation for moisture, which can lead to rot, mold, and structural damage. By learning to spot the telltale signs of failure, you can make an informed decision about when it’s time for a repair or a full replacement. Taking a quick walk around your property a couple of times a year is all it takes to stay ahead of potential problems. Our team is always ready to help you assess the condition of your exterior and explore your options for siding services.
Spotting cracks, warping, or buckling
One of the most obvious signs of siding trouble is visible damage. Take a close look at the surface of your siding panels. Do you see any cracks, chips, or holes? While a single small crack might be an isolated issue, widespread cracking is a red flag. This often happens after years of exposure to Minnesota’s harsh weather cycles. Severe storms can also cause significant impact damage.
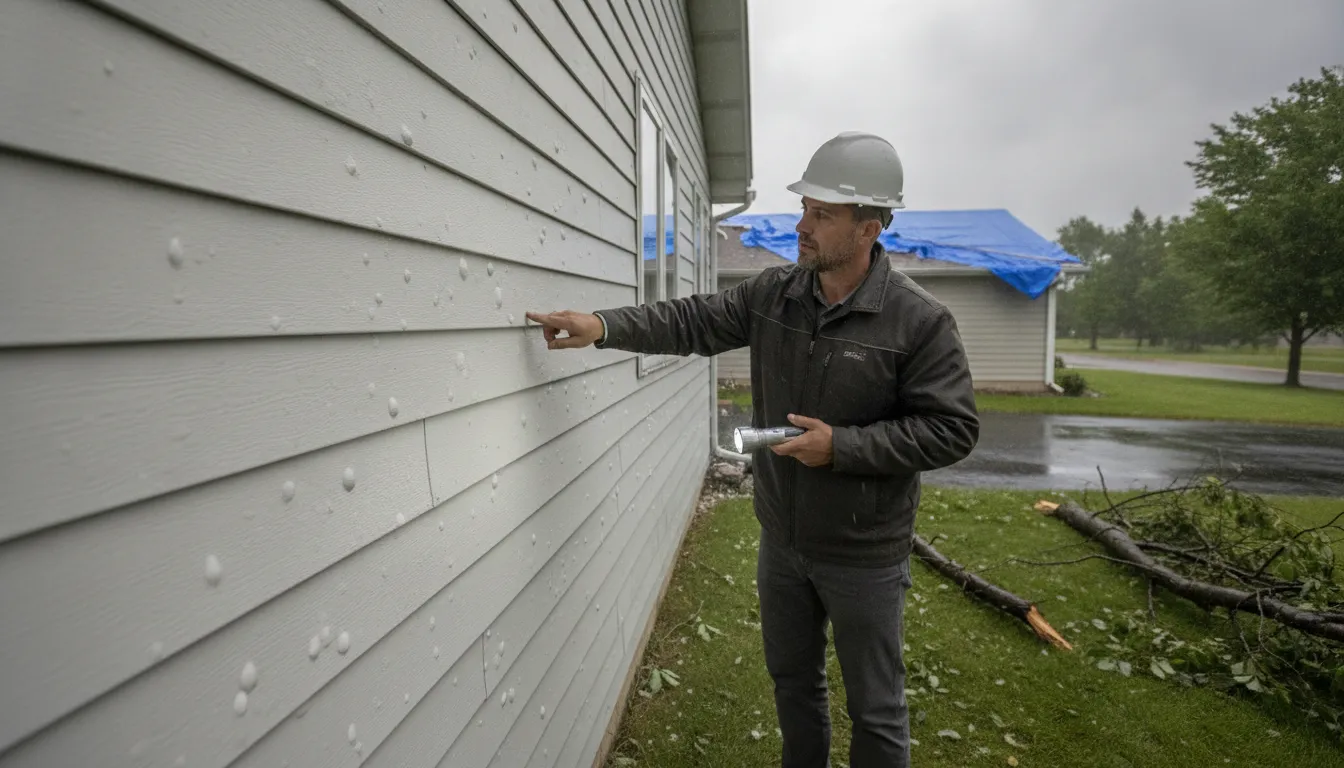
Even more telling are signs of warping or buckling. If you notice that your siding panels are no longer lying flat against the wall, it’s a strong indicator that they need to be replaced. This distortion creates gaps that allow water to seep in behind the siding, potentially damaging the wall sheathing underneath. This is a common problem after a severe hailstorm, so it's always a good idea to inspect your exterior after a major weather event or schedule a professional storm damage repair inspection.
Noticing fading, discoloration, or mold
Your siding’s color does more than just contribute to curb appeal; it’s also part of its protective layer. If you notice that the color has significantly faded, it means the weatherproofing and UV protection have worn away. Siding that requires constant repainting is a classic sign that it’s past its prime. While some chalky residue is normal as vinyl ages, excessive fading leaves the material underneath vulnerable to the elements.
You should also be on the lookout for mold, mildew, or algae. While small patches can sometimes be cleaned off, widespread or recurring growth often points to a deeper moisture problem. Even more serious is dry rot, which causes the siding material to decompose and crumble. You can check for this by gently tapping on the panels. If they feel soft or break apart easily, you’re likely dealing with rot that requires immediate attention.
Seeing higher energy bills or signs of moisture
Sometimes, the most important signs aren’t on the outside of your home at all. Have your heating and cooling bills been creeping up without explanation? Failing siding could be the culprit. Your siding is a key part of your home’s insulation system. When it’s cracked, warped, or pulling away from the walls, it allows outside air to infiltrate your home, forcing your HVAC system to work much harder to maintain a comfortable temperature.
You might also spot signs of moisture inside your home, such as peeling paint or bubbling wallpaper on your exterior walls. This is a serious warning that water has penetrated your siding and is affecting your home’s interior structure. Bubbles or blisters on the siding itself are another clear sign that water is trapped underneath. Since your siding and roof work together as a system, ensuring both are in good shape is essential for protecting your entire home, from the foundation to your residential roofing.
Prepping for Your Project: Tools, Materials, and Tips
A little prep work goes a long way in making sure your siding replacement is a success. Before you even think about removing a panel, it’s smart to get all your ducks in a row. This means gathering the right equipment, choosing materials that fit your home and budget, and planning your project with Minnesota’s weather in mind. Taking the time to prepare properly can save you from headaches and costly mistakes down the road. Let's walk through what you need to know.
The essential tools for siding replacement
If you’re tackling a siding repair yourself, having the right tools is non-negotiable. It’s the difference between a frustrating afternoon and a job well done. For removing old panels, you'll need a special vinyl siding removal tool, often called a zip tool, along with a pry bar for any stubborn sections. When it comes to installation, make sure you have tin snips for cutting panels to size and 1.5-inch aluminum roofing nails to secure them. A hammer, level, and measuring tape are also must-haves. If gathering these tools feels like a project in itself, remember that our team comes fully equipped for all siding services and can handle the job for you.
How to choose the right panels for your home
Vinyl siding isn't a one-size-fits-all product. You’ll find several options, and it’s helpful to "consider the type of vinyl siding: Economy/Builder's, Standard Residential, Thick/Premium, and Insulated, each with different costs and longevity." Economy panels are budget-friendly, while premium and insulated options offer better durability and can even help with your home's energy efficiency. Think about your long-term goals. Are you looking for a quick fix or a lasting investment? We believe in using high-quality materials for every project, from residential roofing to siding, to ensure your home is protected for years to come. Your choice will impact both your budget and how long your new siding will last.
Tips for picking the perfect siding color
Choosing a siding color can feel like a huge decision, but it doesn't have to be stressful. The key is to think about the big picture. As one design expert notes, "Choosing a color without looking at the whole home can lead to regrets; ensure the color complements the overall aesthetic of your house." Take a step back and look at your roof, trim, and even your landscaping. Get a few samples and see how they look next to your home at different times of the day. A color that looks great online might feel different in the morning sun or on a cloudy afternoon. Trust your gut, and don't be afraid to ask for a second opinion.
Planning your installation around the weather
Here in Minnesota, we know that weather can change in an instant. This is especially important to remember when installing vinyl siding. Because vinyl expands in the heat and contracts in the cold, it "needs a little wiggle room; installing panels too tightly can increase the likelihood of breaks, especially with temperature fluctuations." Nailing panels too tight is a common mistake that can lead to warping or cracking. It’s also best to avoid installation in freezing temperatures, as the vinyl can become brittle and difficult to work with. Our professional installers are experts in handling Minnesota’s climate, ensuring every roof replacement and siding project is built to last.
A Step-by-Step Guide to Replacing Vinyl Siding
Replacing your vinyl siding can feel like a huge undertaking, but breaking it down into manageable steps makes the process much clearer. Whether you're tackling a small repair or planning a full replacement, understanding the fundamentals is key to a successful project. This guide walks you through the entire process, from removing the old panels to locking in the new ones. Keep in mind that while replacing a few damaged panels can be a straightforward DIY job, a full home siding replacement is often best left to professionals. An experienced team can spot underlying issues you might miss and has the right equipment to get the job done efficiently and safely, ensuring your home is properly sealed and protected from the elements.
Think of this guide as your roadmap. It will help you understand what the project involves so you can either tackle a small repair with confidence or have a more informed conversation with your contractor about a larger installation. Knowing the steps helps you ask the right questions and ensures you know what quality workmanship looks like from start to finish.
Step 1: Remove the old or damaged panels
First things first, you need to get the old siding off. You’ll want a special zip tool, also called a siding removal tool, for this. Slide the tool up under the bottom lip of the panel directly above the one you're removing and pull down gently to unhook it. This gives you access to the nailing strip of the panel below. Once it’s exposed, use a pry bar or the back of a hammer to carefully pull out the nails holding the damaged panel in place. With the nails gone, the panel should come off easily.
Step 2: Inspect and repair the wall underneath
With the old siding removed, take a good look at what’s underneath. This is your chance to play detective and check the wall sheathing for any signs of trouble. You’re looking for soft spots, discoloration, or evidence of moisture, which could point to rot or water damage. Minnesota weather can be tough, and hidden issues from past storms are common. If you find anything concerning, it’s critical to make those repairs before putting up new siding. Covering up a problem will only lead to bigger, more expensive headaches down the road, which is why a professional storm damage inspection can be so valuable.
Step 3: Install a new moisture barrier
Before you even think about hanging new panels, you need to protect your home with a moisture barrier, often called a house wrap. This material is your home’s last line of defense against water infiltration, preventing moisture from getting trapped in your walls and causing mold or rot. If the existing barrier is torn, damaged, or missing, you’ll need to install a new layer. Make sure you install the house wrap correctly, overlapping the seams and taping them according to the manufacturer’s instructions to create a continuous, water-resistant shield for your home.
Step 4: Measure, cut, and fit the new siding
Now for the fun part: getting the new siding ready. Measure the space where the new panel will go and transfer that measurement to your new piece of vinyl. Remember the old saying: measure twice, cut once. For cutting, you can use a fine-toothed blade on a circular saw (with the blade installed backward for a cleaner cut) or a pair of tin snips. Make sure your cuts are straight and precise. Slide the bottom lip of the new panel into the lock of the panel below it, ensuring it snaps in securely from one end to the other.
Step 5: Secure the panels, leaving room for expansion
This step is where many DIY projects go wrong. Vinyl siding needs to move; it expands in the heat and contracts in the cold. To allow for this movement, you can’t nail it down tightly. When you drive in your nails, place them in the center of the nailing slots, not at the ends. Leave about a 1/32-inch gap (the thickness of a dime) between the nail head and the siding. This small gap is essential for preventing the panels from buckling or cracking as the temperature changes. The Vinyl Siding Institute offers detailed guidelines on proper nailing techniques.
Step 6: Finish the installation
You’re almost there! With your new panel nailed in place, it’s time to lock everything back together. Take your zip tool again and hook it onto the bottom edge of the upper panel (the one you originally unhooked in the first step). Gently pull the lip down and over the top lock of your newly installed panel. You should hear and feel it snap into place. Run your hand along the seam to make sure it’s fully engaged and secure. That’s it, you’ve successfully replaced a section of siding.
How Much Does Vinyl Siding Replacement Cost?
Thinking about replacing your siding is exciting, but let's be real, the first question on everyone's mind is: "What's this going to cost me?" The final price tag for a full vinyl siding replacement can vary quite a bit, but understanding the numbers helps you plan your budget and see it as a valuable home improvement. It’s not just about a fresh look; it’s about protecting your home and adding to its value. We'll walk through the average costs, what drives the price up or down, and whether a DIY approach makes sense for your project.
Understanding average costs and return on investment
Let’s talk numbers. For a full vinyl siding replacement, most homeowners can expect to invest somewhere between $7,000 and $25,000. The national average hovers around $12,221, which gives you a solid baseline for planning. While that might sound like a lot, think of it as a smart investment in your property. New siding offers a fantastic return, with many homeowners recouping around 80% of the project's cost when they sell their home. High-quality siding services not only give your home a beautiful facelift but also contribute directly to its market value, making it a project that pays you back in both curb appeal and equity. It’s one of the most visible and impactful upgrades you can make.
What factors influence the final price?
So, what makes one project cost more than another? A few key things. First is the type of vinyl siding you choose. Options range from budget-friendly standard panels to premium, thicker styles that mimic wood or stone, and even insulated siding for better energy efficiency. Naturally, the size of your house plays a big role; more square footage means more material and time. A home with complex architecture, like multiple gables or lots of windows, will also require more detailed cutting and fitting, which affects the cost. Finally, labor is a major factor, often making up about half of the total project expense. This covers the expertise needed to ensure your siding is installed perfectly and will last for decades.
Comparing the cost of DIY vs. professional installation
It’s tempting to try and save on labor by tackling the project yourself. If you’re just replacing a single cracked or damaged panel, a DIY approach can be a great, cost-effective solution for someone with basic home repair skills. However, a full siding replacement is a different story. It’s a large-scale job that requires precision, the right tools, and a deep understanding of how to protect your home from the elements. While you save on labor costs upfront, mistakes can lead to bigger problems like moisture intrusion or improper insulation. If you uncover widespread issues, professional storm damage repair is the safest path forward to ensure your home is properly protected. Hiring an expert provides peace of mind that the job is done right the first time.
When to Hire a Professional for Your Siding Replacement
Tackling a home improvement project yourself can be incredibly rewarding. While replacing a single cracked vinyl panel might be a manageable weekend task, a full siding replacement is a much larger undertaking. It requires precision, specialized tools, and an understanding of how your home’s exterior systems work together to protect it from the elements. Making a mistake can lead to bigger problems down the road, like moisture damage, poor energy efficiency, or an installation that just doesn’t look right. This is one of those jobs where a small error at the beginning can cause major headaches later on.
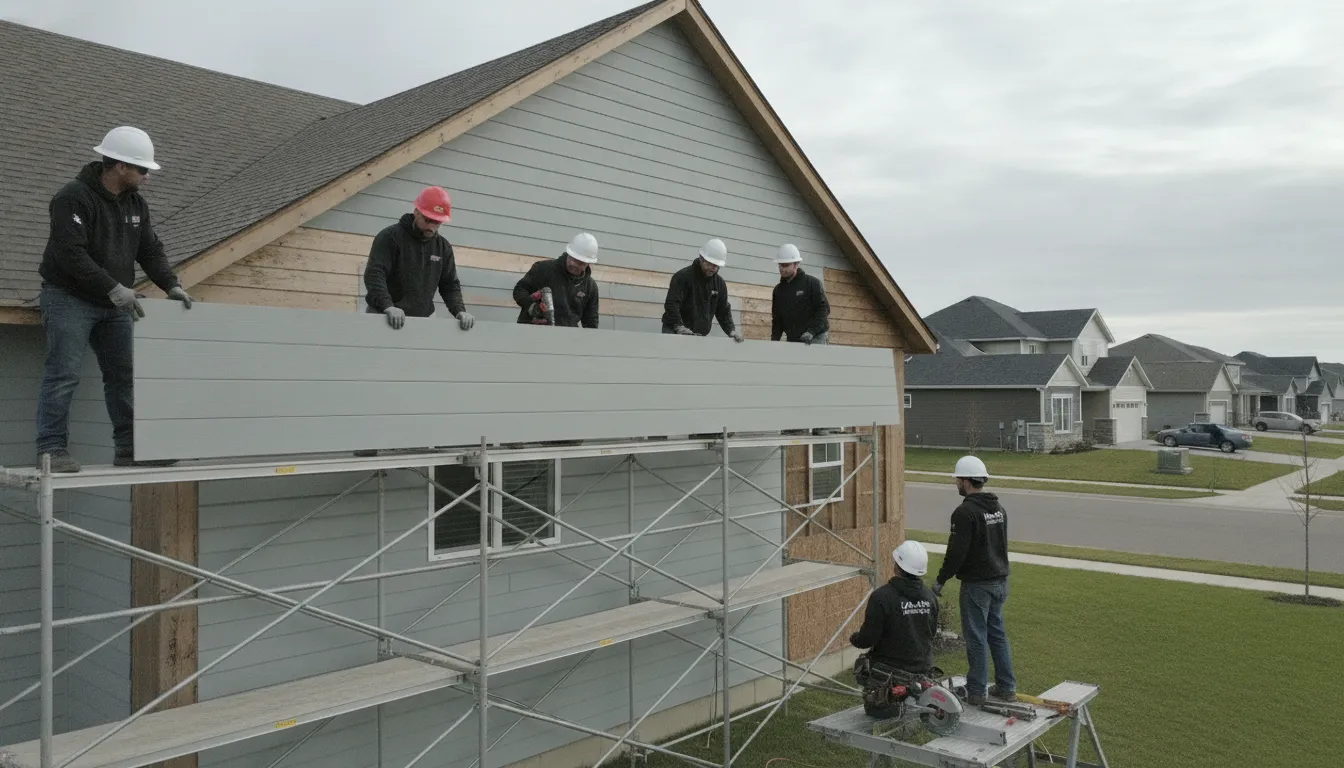
Knowing when to call in a professional is key to protecting your home and your investment. A professional contractor not only brings years of experience but also ensures the job is done correctly and safely, giving you peace of mind. From handling complex installations to spotting hidden damage, an expert eye can make all the difference. If your project involves more than a simple patch-up, or if you're not completely confident in your ability to manage every step, it’s usually best to get a professional opinion before you start pulling off old panels.
For large-scale or complex projects
If you live in a multi-story home or your house has intricate architectural features like gables and dormers, a DIY siding project can quickly become overwhelming and dangerous. Professionals have the right equipment, like scaffolding and safety harnesses, to work efficiently and securely at heights. More importantly, they have the experience to avoid common installation mistakes. A pro knows not to install vinyl siding too tightly, which can cause it to buckle, and they won't overlook crucial water management details that prevent leaks. They can also help you choose a color that complements your entire home, not just the swatch you liked at the store.
If you find storm damage or moisture issues
After a Minnesota hailstorm or high winds, your siding might have obvious cracks or holes. But the real danger often lies beneath the surface. Failing to check the condition of the wall sheathing is a frequent oversight in DIY repairs. If the surface underneath is warped, soft, or shows signs of rot, you must address it before installing new siding. A professional crew is trained to identify and handle underlying issues caused by storm damage or moisture. They can replace damaged sheathing and ensure your home’s structure is sound, preventing small problems from turning into major, expensive repairs.
To avoid common and costly DIY mistakes
A successful siding installation is about more than just nailing up panels. One of the most critical steps is installing a moisture barrier, which protects your home from water intrusion, mold, and rot. Skipping this step is a recipe for disaster. Another common DIY error is failing to account for your local climate. Professionals understand wind resistance requirements and use the correct fasteners to ensure your siding panels don't detach during a storm. Hiring an expert for your siding services ensures every detail is handled correctly, so your new siding looks great and performs perfectly for years to come.
How to choose the right siding contractor
Finding the right contractor is just as important as choosing the right siding. Start by looking for a local company with a proven track record and positive customer reviews. A reputable contractor will be fully licensed, insured, and happy to provide you with a detailed, written estimate for your project. Don’t hesitate to ask about their experience, the types of materials they use, and the warranties they offer on both labor and products. A company that is transparent and communicative, like our team at MN Roofing Company, will make the entire process feel smooth and stress-free.
Related Articles
Frequently Asked Questions
How long can I expect new vinyl siding to last? The lifespan of your vinyl siding really depends on the quality of the product and the installation. Generally, you can expect high-quality vinyl siding to last anywhere from 20 to 40 years. Here in Minnesota, choosing a durable panel and ensuring it's installed by a professional who understands our climate is the best way to get the most life out of your investment.
Will new siding actually help with my high energy bills? Yes, it certainly can. Even standard vinyl siding creates a new barrier against air infiltration, which helps your home stay warmer in the winter and cooler in the summer. For a more significant impact, you can choose insulated vinyl siding. This type has a layer of rigid foam insulation attached to each panel, essentially wrapping your home in a continuous blanket that reduces heat transfer and can lead to noticeable savings on your energy costs.
What's the most common mistake homeowners make with DIY siding projects? The most frequent and costly mistake is improper nailing. Vinyl siding is designed to expand and contract with temperature changes, so it needs to be hung loosely to allow for that movement. Nailing the panels too tightly to the wall can cause them to warp, buckle, or crack over time. It's a small detail that makes a huge difference in the siding's performance and appearance.
Can I just repair one damaged area, or do I need to replace all of my siding? It depends on the situation. If you have a single panel that was damaged by an impact, like a stray baseball or a fallen branch, a simple repair is often all you need. However, if you're seeing widespread issues like cracking, fading, or warping across multiple sections of your home, it's usually a sign that the siding is nearing the end of its life and a full replacement is the better long-term solution.
How much maintenance does vinyl siding really need? Honestly, very little, which is one of its biggest perks. Vinyl siding never needs to be painted or stained. To keep it looking its best, we recommend a simple cleaning once a year. You can just use a soft-bristled brush and a bucket of soapy water to gently scrub away any dirt, pollen, or mildew that has built up.

Comments