
DIY Vinyl Siding Replacement: A Step-by-Step Guide
When you look at your home, the siding is one of the first things you see. It defines your home’s character and curb appeal, but its job goes far beyond just looking good. Your siding is a crucial protective layer that shields your home from the elements and plays a key role in its energy efficiency. If your current siding is old, damaged, or inefficient, you could be losing money on energy bills and missing an opportunity to increase your property value. We’ll explore how a modern vinyl siding replacement is more than just a maintenance task; it’s a smart investment that pays you back for years to come.
Key Takeaways
- Know the signs of siding failure
: Look for visual cues like warping, cracking, significant fading, or mold. These are more than cosmetic flaws; they indicate your siding is losing its ability to protect your home and may be hiding moisture damage.
- Proper installation is about more than just looks
: The success of your project hinges on the details. Always inspect the wall sheathing for rot, use a quality moisture barrier, and nail panels loosely to allow for natural expansion and contraction with temperature changes.
- Understand the value of professional work
: While replacing a single panel can be a manageable DIY task, a full replacement is best left to professionals. They can properly address hidden damage and ensure a weather-tight installation that protects your investment for years.
What Is Vinyl Siding and Why Is It a Homeowner Favorite?
If you’ve ever looked into updating your home’s exterior, you’ve almost certainly come across vinyl siding. Made from a durable plastic resin, it’s one of the most popular siding materials in the country, and for good reason. It strikes a fantastic balance between affordability, durability, and style, making it a practical and attractive choice for many Minnesota homeowners. Whether you're building new or giving your current home a facelift, vinyl offers a reliable solution that protects your home and looks great doing it.
The Main Benefits of Vinyl Siding
So, what makes vinyl siding such a crowd-pleaser? First off, it’s incredibly low maintenance. Unlike wood that needs regular painting or staining, vinyl just needs a simple wash now and then to look its best. It’s also built to withstand harsh weather, from summer sun to winter ice, without chipping, peeling, or rotting. This durability makes it a smart choice for our tough Minnesota seasons. On top of that, vinyl is one of the most affordable siding options available, giving you a major visual upgrade without the huge price tag. It’s a practical investment that improves curb appeal and protects your home for years, which is why it’s a go-to for professional siding services.
Popular Styles and Finishes to Consider
Gone are the days of limited, uninspired vinyl siding options. Today’s vinyl comes in a huge variety of styles and colors, giving you the freedom to create a look that’s uniquely yours. You can choose from traditional horizontal panels, vertical board and batten for a modern farmhouse vibe, or even styles that convincingly mimic the texture of wood shakes. The color palettes are just as diverse, ranging from classic neutrals to bold, contemporary hues with finishes that resist fading. Choosing the right combination can completely refresh your home’s appearance. With so many options, it helps to have an experienced eye, and our team has spent years helping homeowners find the perfect fit for their property and personal style.
How to Know When It's Time for a Siding Replacement
Your home’s siding is its first line of defense against the elements, quietly protecting you from rain, snow, and wind. It’s easy to forget about it until something goes wrong, but paying attention to the subtle (and not-so-subtle) signs of wear can save you from much bigger headaches down the road. Think of it like a regular check-up; catching issues early prevents them from turning into costly structural problems. For Minnesota homeowners, this is especially important, as our dramatic seasons can take a toll on any exterior.
Knowing when to repair versus when to replace your siding can feel tricky. While a single cracked panel from a stray baseball might be a simple fix, widespread issues are a clear signal that your siding’s lifespan is coming to an end. If you notice several of the problems below, it’s a good indication that a full replacement is on the horizon. A full replacement is also an opportunity to upgrade your home’s curb appeal and energy efficiency with modern, durable materials. Our team can help you explore your options for siding services that fit your home's style and budget. It's a chance to not only restore your home's protection but also to give it a fresh new look that you'll love for years to come.
Warping, Buckling, or Cracking
Take a walk around your house and look at your siding from a few different angles. Do you see any panels that are bent, wavy, or bulging? Warped or buckled siding is a telltale sign that something is wrong. This often happens when moisture gets trapped behind the panels, causing the material underneath to swell and push the siding outward. Cracks, whether from age or impact, are also serious because they create a direct path for water to seep into your walls.
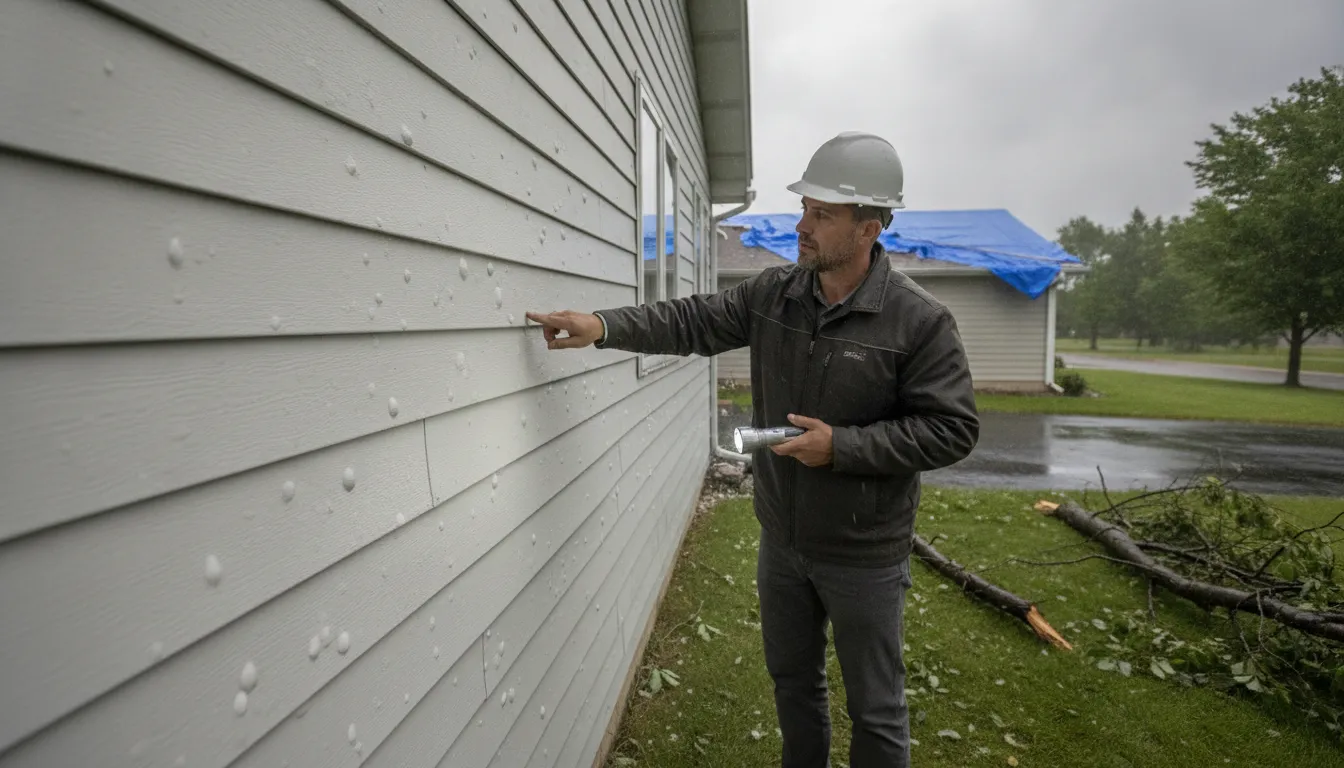
These issues are more than just cosmetic. A common mistake is to ignore what’s happening behind the siding. If the underlying wall is damaged or has started to rot, simply putting new siding over it won’t solve the problem. Any visible distortion means it’s time for a closer look to assess the full extent of the damage and see if you need a storm damage repair.
Fading and Discoloration
While a little fading from the sun is normal over many years, significant or uneven discoloration is a red flag. Your siding’s color is part of a protective finish that helps it resist moisture and UV damage. When that color starts to fade badly, it means the protective layer is breaking down, leaving the siding brittle and more vulnerable to cracking and moisture penetration. If your home looks tired and washed out, it’s not just an aesthetic issue; it’s a sign that your siding is losing its ability to protect your home.
The good news is that a replacement gives you a chance to completely refresh your home’s appearance. When choosing a new color, remember that it will define your home’s character for years. Modern siding materials offer incredible color retention, so you can pick a shade you love and trust it to last.
Moisture Damage and Mold
Your siding’s most important job is to keep your home dry. If you see dark spots, green or black fuzz, or streaks of algae, especially near the seams between panels, you likely have a moisture problem. Don’t just write it off as dirt. Mold and mildew thrive in damp environments, and their presence on your siding could mean water is getting trapped behind it. Another major warning sign is peeling paint or water stains on the interior walls of your home.
Ignoring these signs is a gamble. Skipping the installation of a proper moisture barrier during the initial setup can lead to rot, structural damage, and poor indoor air quality. If you spot mold, it’s important to act quickly. A professional can determine if the issue is just on the surface or if you need a roof repair to address a deeper water intrusion problem.
Higher Energy Bills
Have you noticed your heating or cooling bills creeping up without any obvious explanation? Your old siding could be the culprit. As siding ages and sustains damage, it can develop gaps and cracks that allow air to leak in and out of your home. This forces your HVAC system to work much harder to maintain a comfortable temperature, especially during our cold Minnesota winters and hot, humid summers. Your home’s siding plays a key role in its overall energy efficiency.
Think of new siding as an investment that pays you back over time. Many modern siding options come with built-in insulation, adding an extra thermal layer to your home’s exterior. This can significantly reduce energy loss, leading to lower utility bills and a more comfortable living space year-round.
Gather Your Tools and Materials
A successful siding replacement project starts long before you remove the first panel. Getting all your tools and materials organized ahead of time is the secret to a smooth, frustration-free process. It’s like cooking a new recipe; you want to have all your ingredients measured and ready on the counter before you even turn on the stove. Taking the time to prepare now will save you from making multiple trips to the hardware store and help you get the job done right.
Essential Tools for the Project
You don’t need a workshop full of equipment, but a few specific tools will make this job much easier. The most important one is a vinyl siding removal tool, often called a zip tool. This small, inexpensive gadget is designed to unlock and separate siding panels without causing damage. You’ll also want a pry bar for gently working out nails, a pair of tin snips for cutting the new panel to size, and a hammer. For securing the new siding, make sure you have 1.5-inch galvanized or aluminum roofing nails. These are better than standard nails because they resist rust and have a larger head to hold the siding securely without pulling through.
Choose the Right Replacement Panels
Finding a new piece of siding that perfectly matches your existing panels can sometimes be the trickiest part of the entire project. If you can, bring a small piece of the damaged siding with you to the supplier to match the color, texture, and profile exactly. Keep in mind that sun exposure can fade siding over time, so even a brand-new panel of the same color might look slightly different. If you’re having trouble finding a match, a professional can often source materials more easily or suggest creative solutions. Our team has experience with a wide variety of siding services and can help you find the best fit for your home.
Match the Color and Style
Beyond just the color, pay close attention to the siding’s style and texture. Is it a smooth finish or does it have a wood grain pattern? Is it a traditional clapboard style or a decorative dutch lap? These details make a huge difference in whether your repair blends in or sticks out. Before you commit, hold your sample panel up against the house in different lighting conditions, like in the bright morning sun and in the evening shade. A color that looks right under the fluorescent lights of a store can look completely different outdoors. Taking this extra step ensures your home’s curb appeal remains intact.
Select Insulation and a Moisture Barrier
What’s behind your siding is just as important as the siding itself. When you remove the damaged panel, you’ll expose the wall sheathing. This is your chance to add or replace the moisture barrier, also known as house wrap. Skipping this step is a major mistake, as it can allow water to seep into your walls, leading to rot, mold, and poor energy efficiency. Especially in Minnesota, a quality moisture barrier is essential for protecting your home from snow and rain. A proper siding installation always includes this protective layer to keep your home dry and comfortable for years to come.
How to Replace a Section of Vinyl Siding: A Step-by-Step Guide
Replacing a damaged section of vinyl siding is a project many homeowners can handle with the right tools and a bit of patience. Following a clear process is key to making sure your repair not only looks good but also properly protects your home. This guide will walk you through each step, from removing the old panel to locking in the new one. Remember, while this is a great DIY skill to have, if you uncover widespread issues or feel out of your depth, our team is always here to help with professional siding services to ensure a perfect, long-lasting result.
Step 1: Remove the Damaged Panel
First things first, you need to get the damaged panel out of the way. To do this without damaging the surrounding siding, you’ll need a special zip tool, also known as a siding removal tool. Slide the curved tip of the tool under the bottom edge of the panel above the one you’re replacing. Hook it onto the panel’s bottom lip and pull down and out to "unzip" it from the damaged piece. Work your way along the panel until it’s completely unlocked. This will expose the nailing strip of the damaged panel, allowing you to gently pry out the nails with a pry bar or the claw of a hammer. Once the nails are out, the panel should come off easily.
Step 2: Inspect and Prepare the Wall Beneath
With the damaged siding gone, take a moment to inspect what’s underneath. This is a step you absolutely can't skip. Look closely at the wall sheathing and the moisture barrier (the paper-like material under the siding). Are there any signs of water stains, soft spots, mold, or rot? If you find any underlying damage, it needs to be addressed before you put on a new panel. Simply covering up a problem will only allow it to get worse, leading to more extensive and costly repairs down the road. If the damage looks serious, it’s a good idea to get a professional opinion to ensure your home's structure is sound, especially after a major weather event that might require storm damage repair.
Step 3: Install the New Moisture Barrier
Your home’s moisture barrier, or house wrap, is its last line of defense against water infiltration. If the barrier was damaged when you removed the siding or if it was compromised by whatever damaged the siding in the first place, you’ll need to patch it. Cut a piece of new house wrap that’s large enough to cover the exposed area, with plenty of overlap onto the existing, intact barrier. Tuck the top edge of your patch under the existing wrap above it and lay it over the wrap on the sides and bottom. This ensures any water that gets behind the siding will flow down and out. Secure the patch with sheathing tape or cap staples.
Step 4: Cut and Fit the New Siding
Now it’s time to prepare your replacement panel. Measure the space where the old panel was and cut your new piece of siding to length using a pair of tin snips. It’s important to leave a small gap, about a quarter of an inch, on each end where the panel meets trim pieces. This space allows the vinyl to expand and contract with Minnesota’s temperature swings without buckling or warping. If you had to trim the top of the panel lengthwise, you may need to use a snap-lock punch to create new tabs that will lock into the trim above. This ensures a secure fit that looks clean and professional.
Step 5: Secure and Lock the Panel in Place
To install the new panel, start by hooking its bottom lip onto the top lock of the panel below it. You should feel it snap securely into place. Now you can nail it to the wall. This is where a common DIY mistake happens. Place your nails in the center of the nailing slots, but don’t hammer them in tightly. You should leave about a 1/16-inch gap between the nail head and the vinyl. This allows the panel to move freely as it expands and contracts. Driving the nails too tight is a primary cause of wavy or buckled siding. A professional roof replacement or siding job always accounts for this movement.
Step 6: Finish the Edges and Trim
With your new panel nailed in place, the final step is to lock the panel above it back down. Grab your zip tool again. Hook it onto the bottom lip of the upper panel and pull it down gently, guiding it over the top lock of your newly installed panel. You’ll hear and feel it snap into place as you slide the tool along the length of the panel. Run your hand along the seam to make sure it’s fully engaged and secure. Give your work a final look to ensure everything is flush and clean. This attention to detail is what separates a quick patch from a quality, lasting repair.
Common Siding Replacement Mistakes to Avoid
Taking on a siding replacement project yourself can feel incredibly empowering, but it’s a job where small mistakes can lead to big headaches. A simple oversight during installation can cause issues like warping, water damage, or an inefficient home, completely undoing all your hard work. Getting your siding services right the first time is the best way to protect your investment and keep your home looking its best.
Before you start cutting and nailing, let’s walk through some of the most common pitfalls homeowners encounter. Knowing what to watch out for is half the battle. By avoiding these errors, you can ensure your new siding not only looks fantastic but also performs exactly as it should for years to come, protecting your home from the foundation to the roof.
Nailing Panels Too Tightly
It might seem like the tighter you nail your siding, the more secure it will be, but the opposite is true for vinyl. Vinyl siding needs room to breathe. It naturally expands in the summer heat and contracts during our cold Minnesota winters. If you drive the nails in too tightly, you restrict this movement, which can cause the panels to warp, buckle, or even crack under pressure. To avoid this, make sure to leave a small gap, about the thickness of a dime, between the nail head and the siding panel. The panel should be able to slide slightly from side to side.
Skipping the Wall Inspection
Once you’ve removed the old siding, it’s tempting to jump right into installing the new panels. However, what’s underneath is just as important as the siding itself. Failing to inspect the wall sheathing is a critical mistake. You need to check for any signs of rot, water damage, or mold. Simply covering up these problems won't make them disappear; they will continue to worsen behind your beautiful new siding, potentially leading to structural issues and costly storm damage repairs down the road. If you find any damage, you must fix it before moving forward.
Poor Water Management Around Windows and Doors
Your siding’s main job is to keep water out, and the most vulnerable spots are around windows, doors, and other openings. Proper water management is non-negotiable. This means correctly installing a house wrap and flashing to create a waterproof barrier that directs moisture away from your walls. Skipping or improperly installing these elements can allow water to seep in, leading to rot and mold growth within your home’s structure. It’s not just about hanging siding; it’s about creating a complete, weather-resistant system that protects your entire home.
Picking Siding Unfit for Minnesota Weather
Here in Minnesota, our homes face everything from deep freezes and heavy snow to humid summers and intense sun. Not all siding is built to handle these extremes. Choosing a lower-quality vinyl that isn’t designed for our climate can lead to premature fading, brittleness, and cracking in the cold. When selecting your materials, look for siding that is thick, durable, and specifically rated to withstand the dramatic temperature swings we experience. Investing in the right product for our region ensures your home’s exterior will maintain its beauty and integrity through every season.
Ignoring Local Building Codes
Before you begin any work, it’s essential to understand your local building codes. These regulations aren’t just bureaucratic red tape; they are legal requirements that ensure your project is safe and structurally sound. Codes can specify everything from the type of fasteners you must use to the proper installation techniques for your area. Failing to follow them can result in fines or, even worse, an order to tear down your work and start over. A quick call or visit to your local city planning office can save you from this costly and frustrating scenario. It’s a step that experienced professionals, like our team at MN Roofing Co., never skip.
How Much Does Vinyl Siding Replacement Cost?
Figuring out the budget for a siding replacement is one of the first steps for any homeowner. While the final price tag can vary quite a bit, it helps to have a general idea of what to expect. On average, replacing vinyl siding costs between $3 and $12 per square foot. For a typical home, this often translates to a total project cost ranging from about $6,300 to $18,000, with the national average sitting around $12,200.
Of course, that’s a pretty wide range. Think of it like this: you’re not just buying siding panels, you’re investing in a protective and beautiful exterior for your home. The final cost depends on the quality of the materials you choose, the size and complexity of your house, and the labor involved. A simple, single-story ranch will be on the lower end of the spectrum, while a large, two-story home with intricate architectural details will naturally cost more. Understanding these moving parts will help you get a much clearer picture of your specific project cost and ensure there are no major surprises along the way. Let's break down what goes into that final number.
Factors That Influence the Price
Several key elements determine the total cost of your siding project. The quality of the siding itself is a major factor; thicker, higher-grade vinyl will cost more upfront but offers better durability and longevity. The size and design of your home also play a big role. A multi-story house with lots of corners and gables requires more material and intricate work than a simple, one-level home. Finally, labor can account for up to half of your total project cost. Professional siding services ensure the job is done correctly, which is crucial for protecting your home from the elements.
Potential Hidden Costs
It’s also smart to budget for potential costs that might not be obvious at first. The process starts with removing the old siding, and sometimes, what’s underneath can hold a few surprises. If your contractor discovers issues like rotted wood, water damage, or pest infestations, those problems will need to be addressed before the new siding can be installed. This is especially common after years of harsh Minnesota weather or if the previous siding wasn't installed correctly. Other potential costs include local building permits, new trim, and updated accessories that complete the look of your home’s exterior. A thorough initial inspection can help identify many of these potential issues early on.
DIY vs. Hiring a Pro: What's the Better Value?
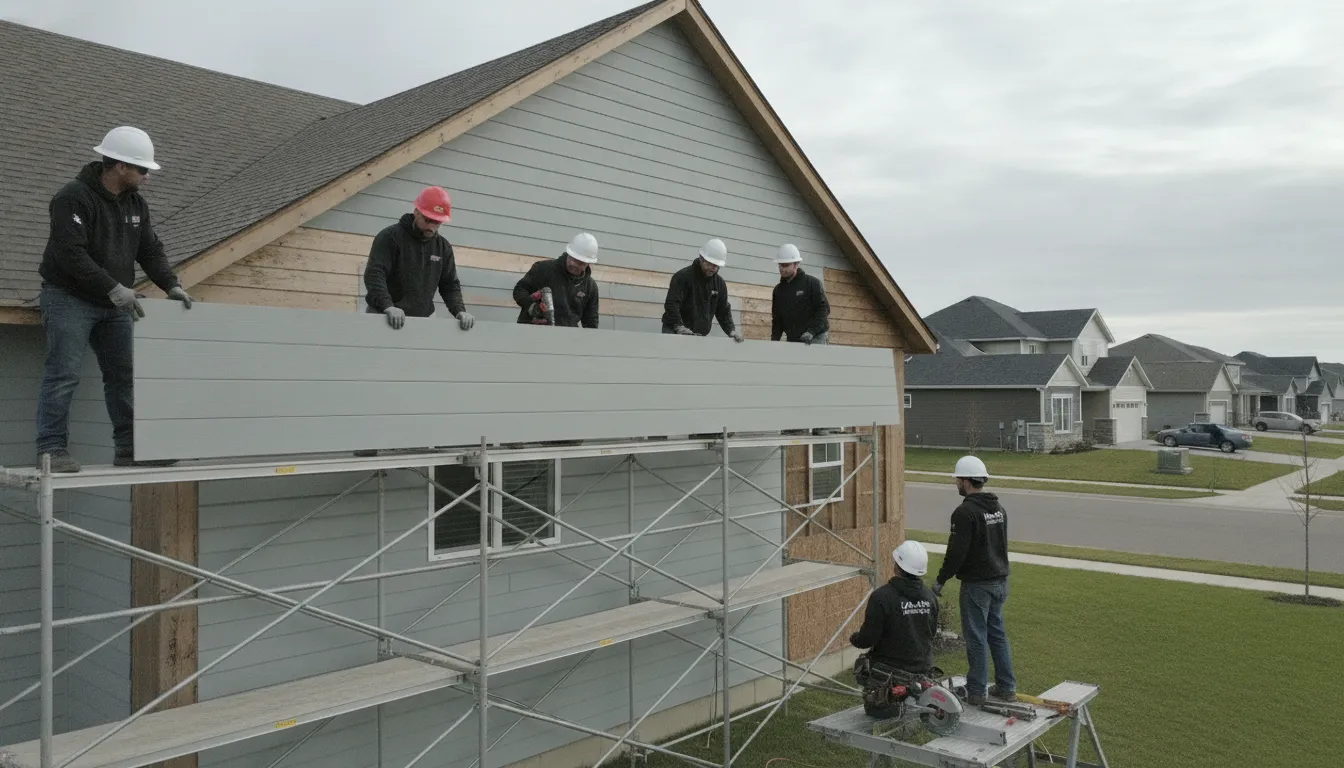
The idea of replacing siding yourself to save on labor costs is tempting. For a very small job, like replacing a single cracked panel, a handy homeowner can often tackle the task without much trouble. However, a full siding replacement is a different story. Improper installation is one of the biggest risks of a DIY project and can lead to serious problems down the road. Nailing panels too tightly can cause them to warp and buckle, while poor sealing around windows and doors can create pathways for water to seep in, leading to costly structural damage. Hiring an experienced team ensures your siding is installed to last, protecting your home and your investment for years to come.
How to Maintain Your New Vinyl Siding
Congratulations on your new vinyl siding! One of the best parts about this material is how low-maintenance it is. With just a little bit of attention each year, you can keep your siding looking brand new and protect your home’s exterior for the long haul. Think of it less as a chore and more as a quick check-up to preserve your home's beautiful curb appeal. Here are a few simple tips to guide you.
Simple Cleaning Techniques
Keeping your vinyl siding clean is usually a simple job you can tackle with a bucket of soapy water and a garden hose. For most dirt and grime, a solution of mild soap and water is all you need. Use a soft-bristle brush or a microfiber cloth to gently scrub away any buildup, working in sections from the top down. This prevents dirty water from running over the areas you’ve already cleaned. Once you’re done scrubbing, just rinse the section thoroughly with your hose. The key is to be gentle; as home experts suggest, the secret to a spotless exterior is gentle scrubbing and a complete rinse to avoid leaving any residue behind.
A Seasonal Inspection Checklist for Minnesota Homes
Here in Minnesota, our siding faces everything from heavy snow and ice to intense summer sun. That’s why a quick seasonal walk-around is a great habit to get into. As the seasons change, take a few minutes to inspect your siding for any potential issues. Here’s what to look for:
Any panels that appear warped, buckled, or cracked.
Signs of moisture, mold, or mildew, especially in shaded areas.
Fading or discoloration that seems uneven or premature.
Loose panels, particularly after a heavy windstorm.
Catching these things early can prevent a small issue from becoming a big problem. If you notice damage that goes beyond simple cleaning, it might be time to consider professional siding services.
Tips for Long-Lasting Color
To keep that fresh, vibrant color looking its best for years, the main rule is to avoid harsh treatments. Abrasive scrubbers, steel wool, or power washers set to a high pressure can scratch and permanently damage the surface of your vinyl, leading to dullness. Instead, always opt for soft cloths or long-handled, soft-bristle brushes for cleaning. When choosing a cleaning solution, it’s always a good idea to test it on a small, inconspicuous area first. Protecting the finish is the best way to ensure your siding’s color stays true and maintains the integrity of your home's exterior.
When to Call a Professional for Siding Replacement
Tackling a DIY project can be incredibly satisfying, but it's also important to know when a job is better left to the experts. When it comes to your home's exterior, making the right call can save you from major headaches and costly repairs down the road. If you find yourself hesitating, or if the project seems too complex, it might be a sign to bring in a professional.
One of the biggest risks with DIY siding replacement is not knowing what’s behind the damaged panel. What seems like a simple swap can quickly become complicated if you find warped, soft, or rotted sheathing underneath. A professional will know exactly how to assess and repair this hidden damage before installing new siding, ensuring the problem is truly fixed. According to GP Construction, failing to check the condition of the wall is a common oversight that can lead to serious structural issues and moisture problems.
Proper installation is also more technical than it looks. Installing a moisture barrier correctly and ensuring each panel has room to expand and contract is critical for preventing water from getting into your walls. In Minnesota, where we see everything from high winds to heavy snow, using the right fasteners is non-negotiable. If the scope of the project feels overwhelming, or if you're dealing with widespread storm damage repair, calling a team for professional siding services is your best bet. They have the experience and tools to handle the complexities of the job, giving you peace of mind that your home is protected.
Related Articles
Frequently Asked Questions
How long can I expect my vinyl siding to last? With proper installation, quality vinyl siding can easily last for decades, often between 20 and 40 years. The actual lifespan depends on the thickness and quality of the vinyl you choose, as well as how well it stands up to our Minnesota weather. Regular cleaning and inspections will help you get the most out of your investment and keep your home protected for a very long time.
My siding is faded but not cracked. Can I just paint it? While you can paint vinyl siding with the right kind of paint, it’s often more of a short-term fix. Significant fading usually means the siding’s original protective coating has worn away, leaving the material brittle and less effective against moisture. Painting covers the cosmetic issue but doesn't restore that protection. A full replacement is typically the better long-term solution for both appearance and performance.
Is it safe to use a power washer to clean my siding? It’s best to be very careful with power washers. Using a high-pressure setting can easily force water up and behind the siding panels, which can lead to moisture problems inside your walls. It can also damage the surface of the vinyl itself. A much safer method is to use a garden hose, a soft-bristle brush, and a bucket of mild, soapy water to gently scrub away dirt and grime.
If I find mold or rot under a damaged panel, what's the next step? Finding rot or mold is a sign to stop what you're doing immediately. This indicates a deeper moisture problem that must be fixed before any new siding goes on. Simply covering it up will only allow the damage to spread, potentially causing serious structural issues. This is the perfect time to call a professional who can assess the extent of the rot and make the necessary repairs to the wall sheathing.
How do I know if I need a simple repair or a full siding replacement? A simple repair is usually fine for isolated issues, like a single panel that was cracked by a stray baseball or a piece that came loose in a storm. However, if you're seeing problems across multiple areas of your home (think widespread warping, significant color fading on all sides, or moisture stains under several windows), these are signs that the entire siding system is nearing the end of its life. In that case, a full replacement is the most effective way to restore your home's protection and curb appeal.

Comments